Recording Techniques, People Skills, Gear, Recording Spaces, Computers, and DIY
Moderators: drumsound, tomb
-
DrummerMan
- george martin
- Posts: 1436
- Joined: Thu Jun 05, 2008 12:18 pm
- Location: Los Angeles
-
Contact:
Post
by DrummerMan » Wed Oct 15, 2008 7:27 pm
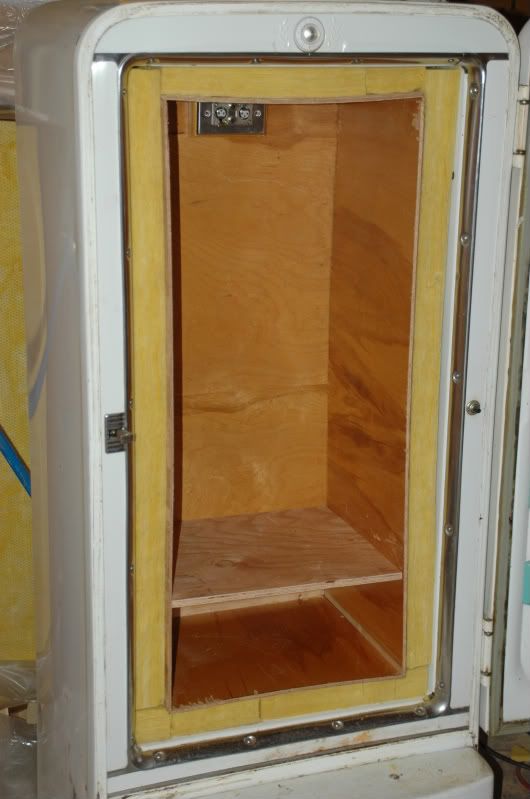
So, I'm building an isolation cabinet for a guitar speaker inside of a cool old 50's fridge I got. This will be so I can have the speaker and a mic sealed up inside for recording while keeping the sound outside to a minimum. The speaker will be mounted to some plywood near the bottom of the fridge, pointing up. I will then have it mic'd up.
My question is, within a sealed box, should I make a "port" in the plywood, or should I seal up the "back" area of the speaker from where the mic will be. I hope I'm making sense right now. I understand the difference between open back and closed back cabinets in the regular world. I guess I'm just wondering if that changes in a small sealed space where the air has pretty much no where to go.
Here's a pic of the insides so far (not done obviously). you can see the piece of ply wood about 6 inches from the bottom. That's where the speaker will be mounted. I can either seal up the edges of that or let air pass through to the upper area.
What're y'alls thoughts?
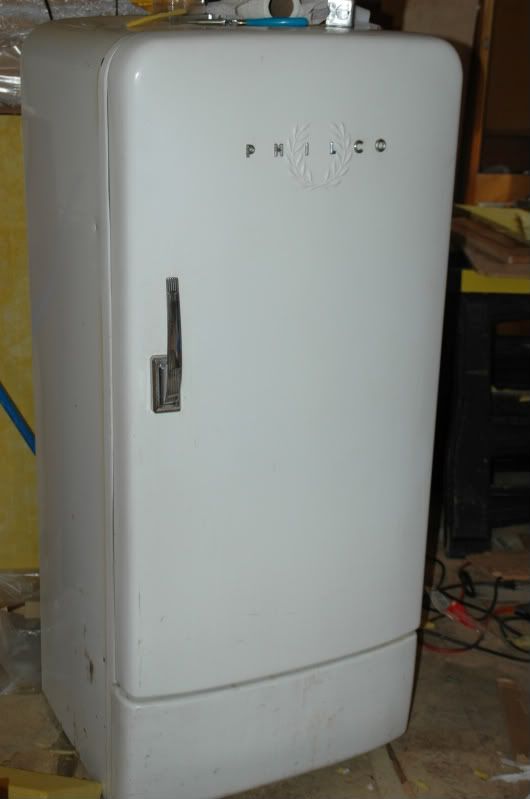
and just for fun, here's a pic of the outside of the fridge. It wasn't working when I got it, but I just had to do something cool with it, and this should actually be very useful to my livelyhood.
Last edited by
DrummerMan on Mon Oct 20, 2008 7:34 pm, edited 1 time in total.
-
blackdiscoball
- suffering 'studio suck'
- Posts: 469
- Joined: Sat Dec 03, 2005 5:32 pm
Post
by blackdiscoball » Wed Oct 15, 2008 8:15 pm
Cant help you with your question but great Idea. That thing looks awesome!
myspace.com/blackdiscoballstudio/
-
GooberNumber9
- tinnitus
- Posts: 1094
- Joined: Fri Oct 20, 2006 7:52 am
- Location: Washington, DC
Post
by GooberNumber9 » Wed Oct 15, 2008 10:24 pm
I messed around with this when I built a much smaller iso box that ended up sounding terrible. I say "no", don't port it.
What made you decide on having the baffle six inches from the "back"? I would almost reverse that. Make the part behind the speaker bigger. Also, you will want as much absoption of mid and high frequencies as you can get in there, to prevent comb filtering.
So A), bigger area behind the speaker to preserve low frequencies and B) mad absorption inside both in front and behind the speaker (mids can travel right through the cone).
BTW, I love the idea of using a fridge for this.
-
DrummerMan
- george martin
- Posts: 1436
- Joined: Thu Jun 05, 2008 12:18 pm
- Location: Los Angeles
-
Contact:
Post
by DrummerMan » Wed Oct 15, 2008 11:41 pm
Interesting.
I haven't attached the plywood yet (just being held in place by pressure) but my thought was to have as much room as possible behind the mic that's on the speaker, so the sound could breath. Like why I'd try not to keep a regular amp's speaker too close to a wall. I also had a thought that I might even try putting a PZM at the very top as a "distance mic"


.I guess sound "breathing" in that tiny of a space is somewhat ridiculous, though. I never really considered the benefits of having all the space
behind the speaker. Hmmmm....
This "cabinet" will be something I'm using specifically for low watt amp heads, with the aim being a bright driving-chimey tone. I've got an old Ampeg Gemini to cover big n' warm when I need it, so this would cover the other end of the spectrum, kinda... Would this fact affect your thoughts on how high to put the speaker? or not at all.
I suppose I could (probably should) get it all wired up and then try the out in a bunch of different positions before nailing it down (literally).
I will definitely take your advice on mid/high absorption. The panel that isn't shown (the one on the door) is all absorption, but maybe I'll also remove the wood panel from the top as well. That would give me a reasonable place to start.
-
GooberNumber9
- tinnitus
- Posts: 1094
- Joined: Fri Oct 20, 2006 7:52 am
- Location: Washington, DC
Post
by GooberNumber9 » Thu Oct 16, 2008 8:14 am
DrummerMan wrote:I suppose I could (probably should) get it all wired up and then try the out in a bunch of different positions before nailing it down (literally).
This sounds like a great idea. You might consider using screws in case you ever want to move it later.
In terms of making the sound "breathe", I don't know if that will be possible in that space. I interpret "breathing" or "airiness" that you get from longer distance miking to be the result of a greater portion of the room sound versus direct sound entering the mic. So, the better your room sounds, the better the results of backing off the mic a bit. In this case, the "room sound" will be a VERY short reverb tail filled with comb filtering and a huge mess of ER. I see an iso cab as an attempt to get the sound of a real speaker (as opposed to a speaker simulator), but otherwise just like a speaker sim: any ambience you want will have to be added by effects.
-
DrummerMan
- george martin
- Posts: 1436
- Joined: Thu Jun 05, 2008 12:18 pm
- Location: Los Angeles
-
Contact:
Post
by DrummerMan » Thu Oct 16, 2008 9:16 am
Even better yet, someone just suggested to me the idea of putting in a bunch of rails at different levels going up. That way, I could change the proportions whenever as needed. All I'd have to do is line the edge of the plywood with something like a thin strip of neoprene to seal it up when it's in place. Also, yes, screws.
Coming together...

-
Nate Dort
- tinnitus
- Posts: 1039
- Joined: Mon Mar 08, 2004 6:07 pm
- Location: Detroit
-
Contact:
Post
by Nate Dort » Thu Oct 16, 2008 10:08 am
I'd get rid of that inner wood box completely and attach the speaker baffle directly to the interior of the fridge walls, and caulk it with silicone around the edges. Leave the rockwool in there though, but maybe cover it with fabric. That way, you've eliminated most of the comb filtering by having a mostly dead space, and you've eliminated the three-leaf design you've got now. A three-leaf space is actually going to transfer more energy to the exterior than a two-leaf space will. The fridge itself is two-leaves of metal with insulation between.
-
DrummerMan
- george martin
- Posts: 1436
- Joined: Thu Jun 05, 2008 12:18 pm
- Location: Los Angeles
-
Contact:
Post
by DrummerMan » Thu Oct 16, 2008 10:45 am
nate wrote:the three-leaf design you've got now.
Good point, though I removed the inside metal panel from the back of the fridge (alot of unnecessarily heavy compressor parts) so that part is still 2-leaf. Maybe I'll just leave that wood panel up and expose (covered with fabric obviously) the rest.
-
RefD
- on a wing and a prayer
- Posts: 5993
- Joined: Fri Aug 27, 2004 9:10 pm
Post
by RefD » Thu Oct 16, 2008 12:49 pm
for an iso box, it is my firm belief that infinite baffle (sealed and unported) is The One True Way.
?What need is there to weep over parts of life? The whole of it calls for tears.? -- Seneca
-
newfuturevintage
- suffering 'studio suck'
- Posts: 479
- Joined: Tue Apr 22, 2008 4:52 pm
Post
by newfuturevintage » Thu Oct 16, 2008 2:42 pm
nate wrote:I'd get rid of that inner wood box completely
+1.
Sweet idea! Would also, on a practical note, make sure you can open the fridge door from the inside in case you have little tykes that might get in there. Old fridges didn't come with the same safety standards new ones do.
I'd also consider making a closed back cabinet you could put inside or take out as needed in the event you get a different amp you need to isolate.
-
DrummerMan
- george martin
- Posts: 1436
- Joined: Thu Jun 05, 2008 12:18 pm
- Location: Los Angeles
-
Contact:
Post
by DrummerMan » Thu Oct 16, 2008 3:28 pm
newfuturevintage wrote:nate wrote:I'd get rid of that inner wood box completely
+1.
Sweet idea! Would also, on a practical note, make sure you can open the fridge door from the inside in case you have little tykes that might get in there. Old fridges didn't come with the same safety standards new ones do.
That's something to think on. I don't know if I'll be able to do that. Luckily, 1) this won't be kept in the house with the little tyke. It'll be in a locked separate structure. 2) It's kind of hard to close, I purposely put extra insulation on the door so that it would seal really tight when shut. You actually have to put your back into it to shut it and I can't see any way of closing it from the inside.
This isn't to say that I won't investigate this further...
newfuturevintage wrote:
I'd also consider making a closed back cabinet you could put inside or take out as needed in the event you get a different amp you need to isolate.
I'm not entirely sure what you're suggesting here, but the idea is that this little speaker will have the potential to be plugged into a variety of low watt amps. It's a decent little Weber 8 ohm job. And I think it'd be able to move to at least the next amp upgrade.
-
BOWIE
- alignin' 24-trk
- Posts: 55
- Joined: Mon Oct 13, 2008 8:35 pm
- Location: Scottsdale, AZ.
Post
by BOWIE » Sat Oct 18, 2008 12:39 pm
That old Philco looks KILLER!
I think the sound in the is going to be really "boxy" (literally) in there. I don't know if it was mentioned already, but I would stuff it with bass traps. You'd have a sweet iso box with minimal reflections in that small space.
-
Jon~T
- gettin' sounds
- Posts: 148
- Joined: Thu Nov 01, 2007 10:04 am
- Location: Toronto
-
Contact:
Post
by Jon~T » Sat Oct 18, 2008 11:51 pm
That's a great idea!
and still leaves you room for some beer in the bottom!
-
daveg62
- gimme a little kick & snare
- Posts: 92
- Joined: Fri Mar 21, 2008 2:39 pm
Post
by daveg62 » Mon Oct 20, 2008 6:43 pm
Cool idea! I built an iso box and all I can say is you have to try different combinations of absoption and mics until you find something that sounds decent. I personaly would leave the box the way you have it and add fiberglass inside until it sounds the way you want it. I'd start with 50% of the surfaces and go from there. You might find it's not necessary to totally deaden every surface.
-
DrummerMan
- george martin
- Posts: 1436
- Joined: Thu Jun 05, 2008 12:18 pm
- Location: Los Angeles
-
Contact:
Post
by DrummerMan » Mon Oct 20, 2008 7:33 pm
Well, as of today, I've taken out the wood panels on the sides and top (and covered the fiberglass in a cool/ugly 60's grandma paisley-esque pattern fabric), but left the wood on the bottom and back, so there's still a touch of reflection, but no parallel reflection, and it's mostly absorption. I'll take some pics tomorrow, 'cause it's at least
looking pretty cool. The speaker should be here in a few days and hopefully by then I should be able to finish wiring the outside jack plate. Of course, this whole thing is residing in my FUTURE studio space, which is in the middle of construction right now. Currently, my recording equipment is in my living room until the space is ready so I'll have to be patient to really test out how it sounds and do the final tweaking, 'cuz I'm sure as fuck not lugging that fridge into my living room.
Who is online
Users browsing this forum: No registered users and 140 guests