Recording Techniques, People Skills, Gear, Recording Spaces, Computers, and DIY
Moderators: drumsound, tomb
-
trodden
- on a wing and a prayer
- Posts: 5700
- Joined: Wed May 07, 2003 8:21 am
- Location: C-attle
-
Contact:
Post
by trodden » Mon Dec 26, 2005 11:24 pm
Sorry to take so fekin' long to get some more pictures, Some of you have been extremely patient.
I'm found the "plans" that i drew out for these when originally putting them together in my head.. I can't scan it cause it makes no sense to anyone but me.. i'll try to get a chance to redraw and list the measurments sometime this week.
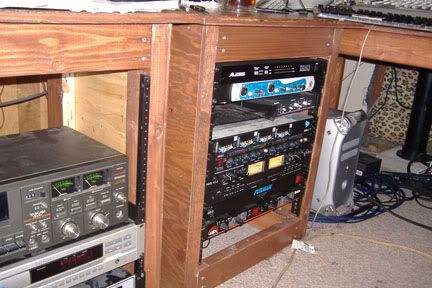
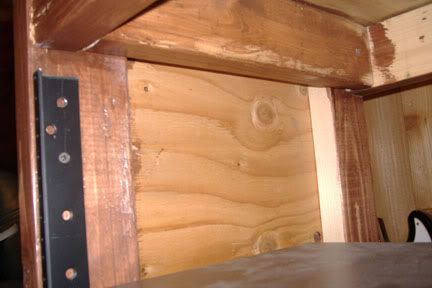
this photo is upper right corner..obviously i didn't pay as much attention to the finish of the inside..

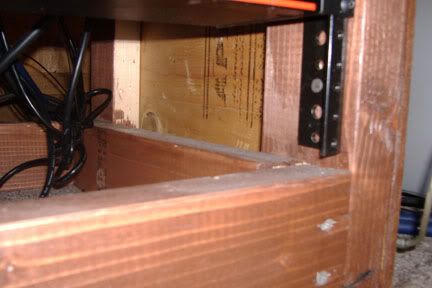
and the bottom right...
The "frame" is symmetrical, top/bottom parts are the same to each other. and then left/right are equal to each other.
-
trodden
- on a wing and a prayer
- Posts: 5700
- Joined: Wed May 07, 2003 8:21 am
- Location: C-attle
-
Contact:
Post
by trodden » Tue Dec 27, 2005 10:35 am
damn, i need to dust.
-
thesimulacre
- takin' a dinner break
- Posts: 171
- Joined: Tue Dec 20, 2005 10:26 pm
- Location: Colorado
Post
by thesimulacre » Tue Dec 27, 2005 1:24 pm
Some 19" gear (usually the older stuff) is a little bit wider than others. A sure-fire way to get it right the first time is to mount three pieces of gear to just the rails and measure or cut or assemble everthing around these (hopefully cheap if you are drunk/st***d and wielding a power tool) units. You should use your two longest pieces at the ends and the shortest somewhere in the middle in order to establish the ideal min/max range. Or you could vice-versa that I guess. It's not THE way, but it's a good way. I'll post a pic of the desk that sacrificed it's surface area for the good of the gear when I get all the Christmas pics cleaned off the camera.
-
trodden
- on a wing and a prayer
- Posts: 5700
- Joined: Wed May 07, 2003 8:21 am
- Location: C-attle
-
Contact:
Post
by trodden » Tue Dec 27, 2005 1:40 pm
thesimulacre wrote:Some 19" gear (usually the older stuff) is a little bit wider than others. A sure-fire way to get it right the first time is to mount three pieces of gear to just the rails and measure or cut or assemble everthing around these (hopefully cheap if you are drunk/st***d and wielding a power tool) units. You should use your two longest pieces at the ends and the shortest somewhere in the middle in order to establish the ideal min/max range. Or you could vice-versa that I guess. It's not THE way, but it's a good way. I'll post a pic of the desk that sacrificed it's surface area for the good of the gear when I get all the Christmas pics cleaned off the camera.
ethactly how i came up with my measurements...
the 2x4's on the top and the bottom (featured in pict #3 above the Alesis rack unit and in picture #4 under the Vortex) between the two side 2x4's the rack rails are screwed to are 19 1/8" long.
-
thesimulacre
- takin' a dinner break
- Posts: 171
- Joined: Tue Dec 20, 2005 10:26 pm
- Location: Colorado
Post
by thesimulacre » Tue Dec 27, 2005 4:03 pm
Here's the sacrificial desk I spoke of...

Just two more-or-less triangular pieces of 3/4" particle board with the space in-between them cut out to allow for gear to stick through. I reinforced the desk's cross-brace with an excessively large amount of triangular supports just in case...you should see the under side. Anyway, this was really easy to build and now I can reach/see all my crappy gear!
Last edited by
thesimulacre on Wed Jan 11, 2006 1:38 pm, edited 1 time in total.
-
thesimulacre
- takin' a dinner break
- Posts: 171
- Joined: Tue Dec 20, 2005 10:26 pm
- Location: Colorado
Post
by thesimulacre » Tue Dec 27, 2005 4:08 pm
[post edited due to unnecessary picture]
Last edited by
thesimulacre on Wed Jan 11, 2006 1:36 pm, edited 1 time in total.
-
ryangobie
- steve albini likes it
- Posts: 306
- Joined: Fri Aug 29, 2003 5:12 pm
- Location: jersey
Post
by ryangobie » Thu Dec 29, 2005 8:51 am
i'm need some rack space soon too...can you get something that'd work as rack rail at homedepot or something? 25 a hit from musicians friend? shit i'm cheaper than that...specially when i have access to a milling machine and the rest of a metal working shop if need be.
weeeee
-
djimbe
- tinnitus
- Posts: 1179
- Joined: Wed May 07, 2003 4:55 am
- Location: chicago
-
Contact:
Post
by djimbe » Thu Dec 29, 2005 9:19 am
can you get something that'd work as rack rail at homedepot or something
With access to metal working equipment, all you'd need is some 1" x 1" x 1/8" steel angle iron. Then you gotta program a CNC machine to punch the correct size holes in the angle at the correct spacing for gear. The spacing you could find from measuring some existing rack rail, and the tap drill size for #10-24 screws (or is it #10-32...I forget right now...) you could get outa Machiney's Handbook. Once the rails are drilled, then you need to tap out your holes, and you're set. It's actually a lotta work...
I'm sure if you went to someplace like Parts Express you could find already manufactured rail cheaper than The Fiend.
The other option is to use something like hard maple wood strips for your rack rail, and then you can drill it as needed for each piece of gear you load into your rack. Not as flexible as real rail but way cheap, and maple is plenty sturdy...
I thought this club was for musicians. Who let the drummer in here??
-
Shane Michael Rose
- steve albini likes it
- Posts: 326
- Joined: Tue Nov 02, 2004 2:11 pm
- Location: Brooklyn NY
-
Contact:
Post
by Shane Michael Rose » Mon Jan 02, 2006 7:08 pm
i just did a rack similar to this. it worked out pretty well. i have to put the rails on tomorrow and stain it... after that i will try to get pixxxx!
Who is online
Users browsing this forum: Google [Bot], Jarvis, T-rex and 140 guests

