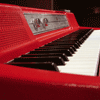
hi folks, i am approaching organ heaven with my newly-working leslie, and wanted to get my little M3 working fully. the problem: not all of the drawbars and percussion are triggered on all the keys. there's a random smattering of them that dont work on several keys.
im pretty confident its in the key contacts, as a few of them i have been able to fix by shaking/wiggling/etc.
i've googled this, and understand that they can be cleaned. but i havent found any info on HOW to access them, only the busbar. looking from the back, i cant see how to dissassemble the manuals.
any leads? thanks much.
cleaning the drawbar contacts on keys of hammond organ?

The full instructions used to be available at tonewheel.com, but they've removed it. If you know about the busbar, it's a matter of holding down a group of keys(a 2x4 with some weight on it could hold down a group of keys), then SLIGHTLY turn the busbar adj with a screwdriver.. maybe a 5 degree turn in either direction. Then hold another group, but turn the adj 5 degrees in the opposite direction. Continue until you've done all the keys. They can be held down individually, but the 2x4 trick saves time. Try on a problem key by itself and see if it works. This proceedure does wear on the componants, so it should only be done when absolutely necessary.
BTW, you don't have to dismantle anything.
Best, Paul
BTW, you don't have to dismantle anything.
Best, Paul
WADAYAKNOW.. For the first time in my life, I'm wrong again!

-
blackdiscoball

- suffering 'studio suck'
- Posts: 469
- Joined: Sat Dec 03, 2005 5:32 pm
I cant be a ton of help but a studio I was interning at the the owner wanted to clean his, we opened it up and took cleaned it up. Half way through we had a session and the session keyboard player who came in and played keys for the session saw the hammond and told the owner he was nuts for trying to clean that since apparently its pretty risky business and only a few techs in the area even do that. I was around for the rest but they did get it together and it works great. Just a though about doing it your self. Take that all with a grain of salt though, it might be a easy thing.
myspace.com/blackdiscoballstudio/
The busbars are the key contacts. You need to do a busbar lube. Basically, you remove each bussbar, clean it with denatured alcohol, and put it back in. There are 9 busbars total (one for each drawbar) for each manual.
I have not done a busbar lube on a spinet model, but on the B3 they are accessable at the sides of the manuals only. To do the B3, I unsoldered about half the wires going from the tonewheel generator to the manuals, took the bolts out of the manuals, put the B3 on it's side, and folded the manuals out like the pages of a book. That gave me access to the side, where there's a little panel to get to the busbars.
Shifting the whole assembly with that screw is extremely dangerous. You can very easily ruin the bussbars. Each busbar has a tiny wire of tungsten on it and if that wire is severed, you're screwed.
Cleaning the busbars also lasts longer than turning that screw.
Now, if I could just remember how to get to them in a spinet.
www.organissimo.org
organissimo - Dedicated (new CD)
"This shitty room is making your next hit record, bitch!"
organissimo - Dedicated (new CD)
"This shitty room is making your next hit record, bitch!"
mr groover-thanks alot. ooof! this looks like its a bitch. i've got the manual portion of the organ partially dissassembled, and looking at it, i have NO visual access to anything that looks like a busbar.
i might just say screw it, reassemble, and live with it. maybe someday i'll score a new place and a full size organ. thanks for the help.
i might just say screw it, reassemble, and live with it. maybe someday i'll score a new place and a full size organ. thanks for the help.
The busbar plate is on the side of the manuals on the B3. If I remember correctly (it's been 10 years since I did mine), they are on the right side (if looking at the front of the organ).
Found this page and he describes basically the same scenario:
And I was wrong about the wire. It's palladium, not tungsten.
Found this page and he describes basically the same scenario:
The hardest part is getting the busbars back in. You have to feed them very carefully back through the chassis. It takes patience.KEY CONTACT PROBLEMS
NOT SURPRISINGLY, INTERMITTENT KEY CONTACTS ON MACHINES OF THIS AGE ARE COMMONPLACE ON THE HAMMOND C3 & OTHER HAMMOND TONEWHEEL ORGANS. TO RESOLVE THE PROBLEM, DO NOT JUST HOLD THE KEYS DOWN WITH A PLANK OF WOOD & TURN THE BUSBAR SHIFTER SCREWS. THIS WAS A BRILLIANT INNOVATION AT THE TIME FROM MR. HAMMOND, BUT AFTER ALL THESE YEARS, ALL YOU WILL END UP DOING IS RE-DISTRIBUTING THE DIRT. THE KEY CONTACTS WILL GET WORSE. YOU MAY EVEN DAMAGE THE PALLADIUM WIRE ON THE OLDER TYPE OF ORGAN. (SEE NOTES ABOVE ABOUT CABINET TYPE & AGE) WHAT YOU NEED TO DO IS PHYSICALLY REMOVE THE BUSBARS & CLEAN THEM WITH ISOPROPYL ALCOHOL. IT IS NOT RECOMMENDED FOR THE FAINT HEARTED, BUT HOW YOU DO THIS IS AS FOLLOWS:
BE CAREFUL & THINK
REMOVE THE LARGE BOLTS UNDERNEATH THE CABINET WHICH HOLD THE KEYBOARD UNITS IN PLACE. REMOVE THE MUSIC RACK RAIL & POWER SWITCHES. REMOVE THE LARGE BOLTS EITHER SIDE OF THE MANUALS TO SEPERATE THEM. WITH THE HELP OF AN ASSISTANT CAREFULLY LIFT UP THE MANUALS TO THE RIGHT, UPPER MANUAL FIRST (FROM THE FRONT) UNTIL YOU CAN GET AT THE BUSBAR COVER PLATES. UNDO ANY CABLE STRAPPING TO ALLOW THIS TO HAPPEN, BE CAREFUL OF THE GENERATOR WIRES, THEY ARE SOLID CORED & CAN SNAP EASILY.REMOVE THE SMALL WOOD SCREWS HOLDING THE BUSBAR METAL COVER PLATES. SLACKEN, BUT DO NOT REMOVE THE SCREWS HOLDING THE SLOTTED BUSBAR SECURING PAXOLIN PLATES IN PLACE. CAREFULLY WITHDRAW THE 1st BUSBAR & CLEAN IT. REPLACE 1st BUSBAR CAREFULLY & FEEL YOUR WAY WITH IT ALONG THE GUIDES. A MIDWIFE'S TOUCH IS DEFINITELY REQUIRED HERE, DO NOT UNDER ANY CIRCUMSTANCES FORCE IT.
THEN ...........
WITHDRAW THE 2nd BUSBAR, INSPECT, CLEAN & REPLACE THEN JUST REPEAT THE SAME PROCESS FOR ALL THE REST. EASYINNIT? WHEN ALL ARE RE-FITTED, POSITION THE BUSBAR SHIFTER IN A CENTRAL POSITION AFTER SLIDING THE SLOTTED PAXOLIN COVER PLATE BACK & RE-TIGHTENING THE SCREWS. I'VE DONE THIS JOB SO MANY TIMES, I CAN DO IT ALMOST BLINDFOLD!
RE-ASSEMBLY IS THE REVERSE OF DIS-ASSEMBLY!!
PLEASE NOTE:
DO NOT UNDER ANY CIRCUMSTANCES USE SILICON GREASE SPRAYS, OR ANY PROPRIETARY CLEANER THAT LEAVES A DEPOSIT. ALL THIS GREASE DOES IS ATTRACT MORE DUST! IF YOU OWN AN OLD C3 WITH THE SQUARE TYPE BUSBARS, BE VERY, VERY CAREFUL. IF THE PALLADIUM CONTACT WIRE IS DAMAGED & DETACHED FROM THE BUSBAR THE BEST THING TO DO IS EITHER REPLACE THE BUSBAR IF YOU CAN GET ANY, OR AS A LAST RESORT REMOVE ONLY THE DAMAGED BIT OF PALLADIUM WIRE. THE LATER TYPE USE ROUND GOLD PLATED BUSBARS, THESE ARE NOT AS FRAGILE, BUT SADLY NOT AS GOOD AT THE JOB.
And I was wrong about the wire. It's palladium, not tungsten.
www.organissimo.org
organissimo - Dedicated (new CD)
"This shitty room is making your next hit record, bitch!"
organissimo - Dedicated (new CD)
"This shitty room is making your next hit record, bitch!"
-
atavacron
- steve albini likes it
- Posts: 348
- Joined: Mon Nov 03, 2008 2:50 am
- Location: Oakland, California
- Contact:
There are few remaining old-school organ service techs out there, and Bob Schleicher is one of the oldest. No wonder he took down the instructions -- gotta preserve some of the mystery, I guess. If you sniff around you'll find quotes from him on almost every Hammond/Leslie site, often times with more clear detail than anyone else's instructions.paully wrote:The full instructions used to be available at tonewheel.com, but they've removed it.
Damn, that guy is an excellent technician. I've done quite a bit of basic work on my M3 and Leslies, but anytime I don't get it, I bring the part in question to Bob and he does an amazing job, amazingly fast.
Oh, I am lucky to live in Oakland...
shipwreckoakland.com
5 1 0 . 9 7 2 . T A P E
5 1 0 . 9 7 2 . T A P E
-
substitute
- pushin' record
- Posts: 254
- Joined: Wed Mar 10, 2004 8:28 am
-
daniel ramirez
- ass engineer
- Posts: 43
- Joined: Sun Nov 30, 2008 7:09 pm
hey guys
I have the service manual for the M-series around here somewhere but went through some new computers lately, so it might take me a minute to find a copy.
from my experience though, if repeatedly hitting the key 100 times fast doesn't work, you can take the top off and do what you have to to get into the guts of it and spray the contact points with deoxit d-5 and wipe a little if necessary and make an intermittent organ sound good quick.
I am not an "old school organ tech" but I am near phila and know my hammonds pretty well.
good luck, i'll get back to you if i find the manual.
d
-
daniel ramirez
- ass engineer
- Posts: 43
- Joined: Sun Nov 30, 2008 7:09 pm
M-series service manualatavacron wrote:oh heck yes! i didn't even know there was a service manual.
http://www.sendspace.com/file/4wnmvi
i have the B3/C3 and the A100 as well.
Also Wurli service manual.
Lemme know if Anyone wants them.
It would be great if someone wanted to host them.
thanks for this manual!
substitute-yup, im in philly. that would probably be helpful info to have-i dont think i'd drop coin to fix up an M3 that really isnt worth much, but hopefully i'll need a real tech someday. i have dreams of buying a "real" studio and then getting a "real" hammond.....a guy can dream....
substitute-yup, im in philly. that would probably be helpful info to have-i dont think i'd drop coin to fix up an M3 that really isnt worth much, but hopefully i'll need a real tech someday. i have dreams of buying a "real" studio and then getting a "real" hammond.....a guy can dream....
Who is online
Users browsing this forum: No registered users and 133 guests