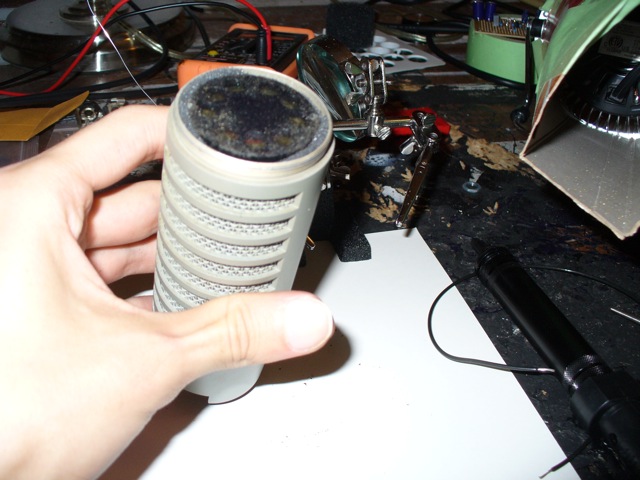
The RE-20 has three essential foam filters that have a tendency to turn into disgusting goop. For some reason, EV decided to combine this charming quality with a mechanical design that makes it a bit of a challenge to take the mic apart. Here's how I managed.
If you do this, please keep in mind that you're only a small slip away from destroying your mic. This isn't the best project if you're totally new to DIY.
Tools you'll need
small flat-head screwdriver
9/64" hex key
0.035" hex key (you can get this from McMaster-Carr for a few cents)
small pliers
wire cutters/strippers
soldering iron (solder wick or a solder sucker will help)
cleaning supplies I used: toothbrush, q-tips, scotch-brite, isopropyl alcohol
Parts you need to get
You can buy these directly from EV's parent company, Telex/Bosch, by calling their customer service line, or you can get them from Full Compass or another distributor.
I have two part numbers for each foam piece. The ones that start with 7823 are their older numbers, I believe, and the ones starting with F01U are current. These prices are what they charged me; these might change, of course. Bosch has a minimum order of $25, and shipping was around $14. It might be cheaper to purchase from a distributor.
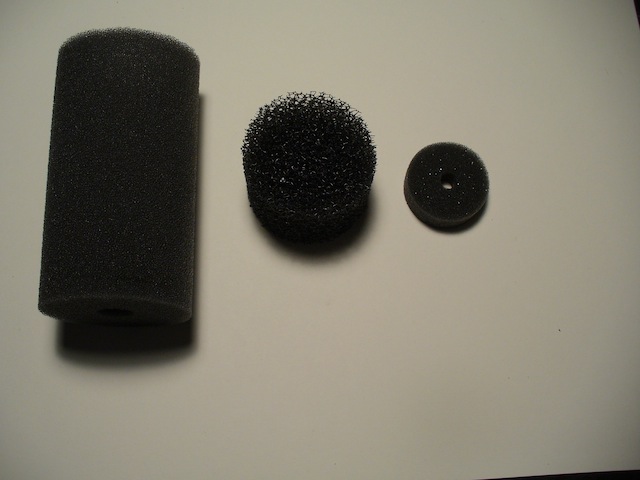
From left to right.
78233 - F01U110422 - windscreen - $8.80
78231 - F01U110421 - pop filter - $1.71
78232 - F01U153540 - rear foam - $1.38
If you want, you can also replace the mesh screen that covers the capsule. That part is 78230 - F01U153539 and costs $4.43. I chickened out and didn't replace that on mine. It doesn't degrade like the foam, anyway.
Now, here we go.
Taking the mic apart
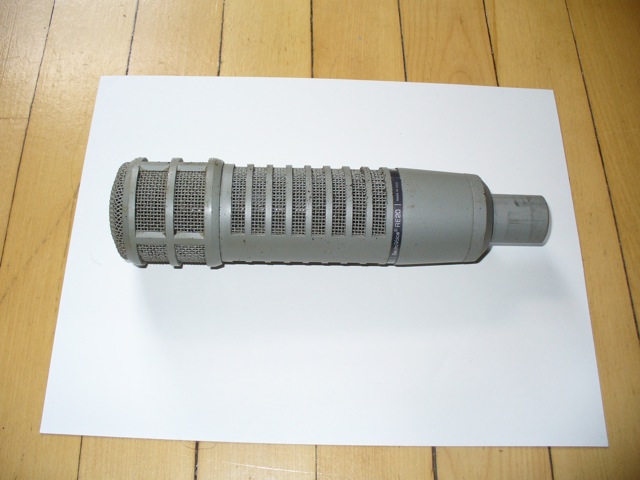
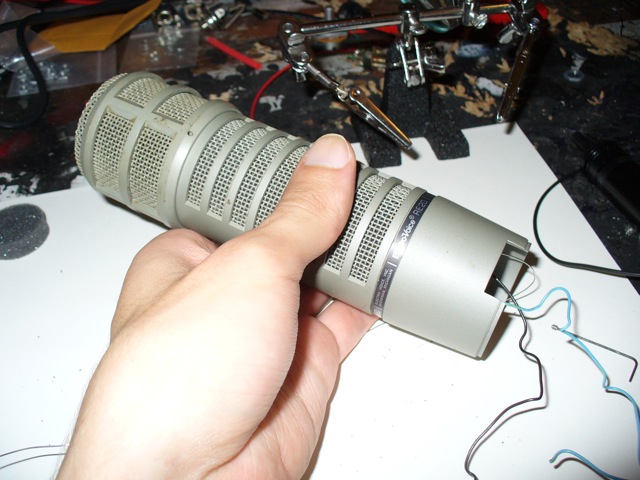
Here's what I've got.
First, use the small hex key to remove this screw in the grill.

Once the screw's out, unscrew the grill from the body.
In order to remove the xlr jack, you need to tighten this screw so it no longer prevents the jack from sliding out. Apparently, this sometimes has a dab of glue?if that's the case, dissolve the glue with isopropyl alcohol or acetone. Mine didn't.

Pull the xlr connector out with your pliers.
Remove this hex bolt that was hiding behind the jack with your 9/64" key.

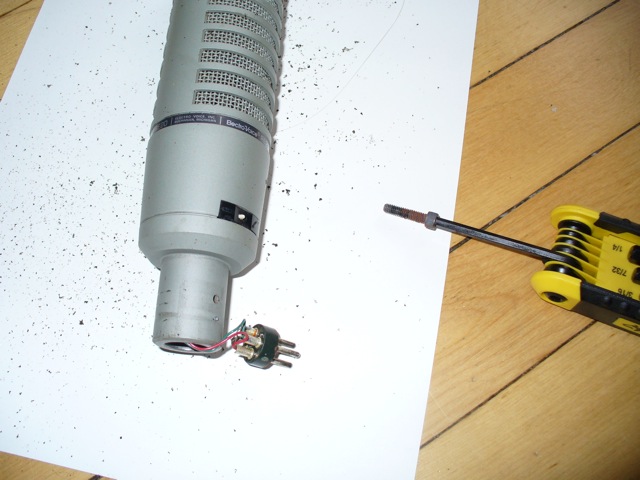
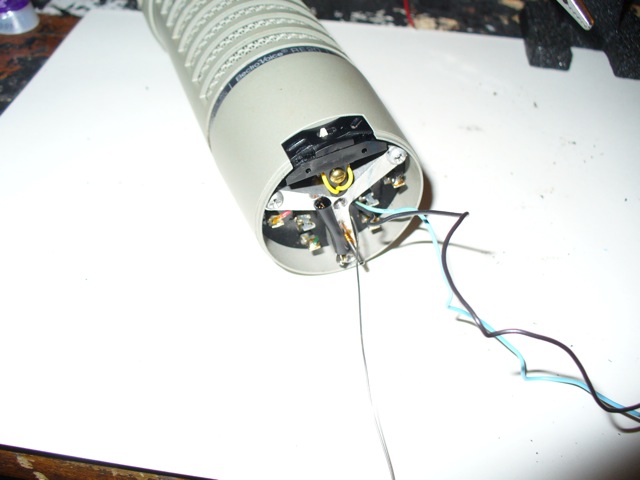
Unscrew this Y shaped bracket. There are three screws holding it in. Note: the ground wire was already broken on my mic. The unshielded copper wire should be attached to a lug.

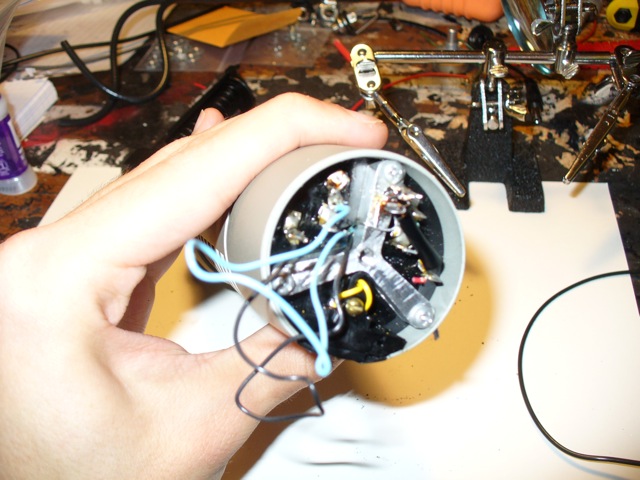
Carefully pull the electronics assembly out of the mic.
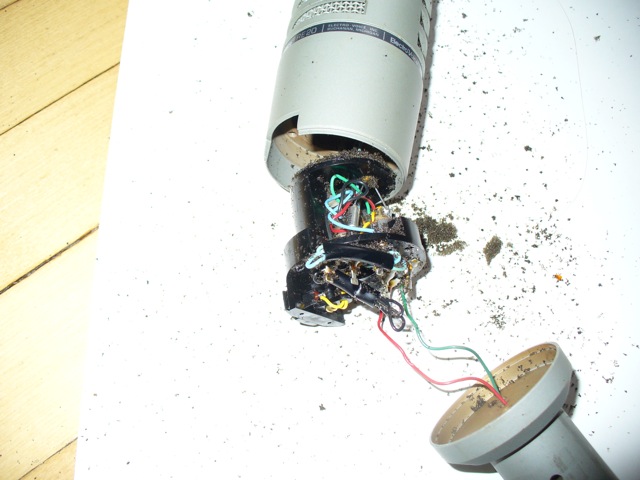
Remove the little pieces of black tubing holding the wires in bundles.
After noting what goes where, desolder or cut the blue and black wires (the ones that go up through the body of the mic) where they connect to the assembly.

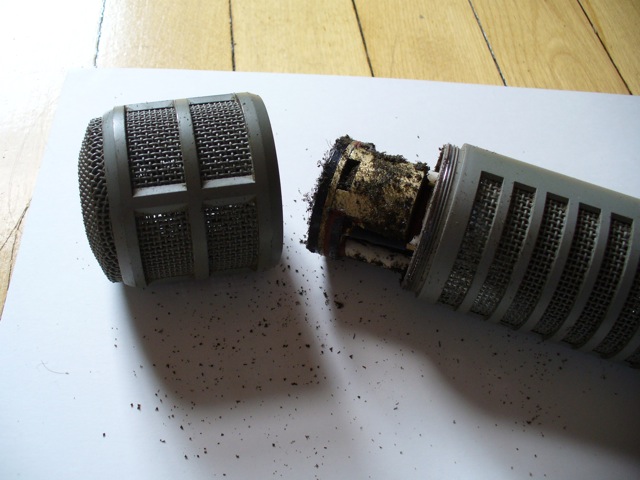
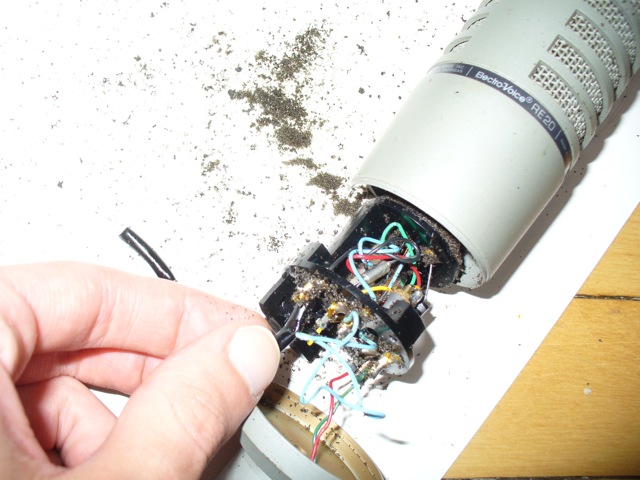
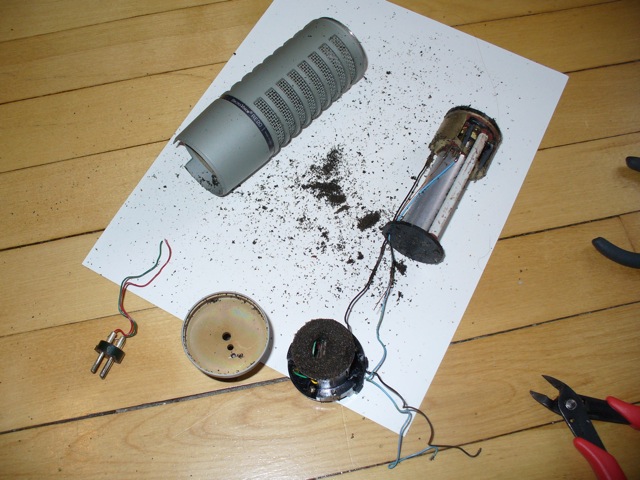
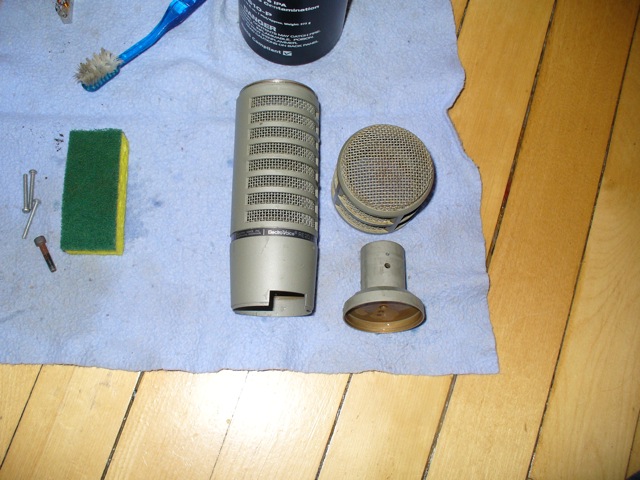
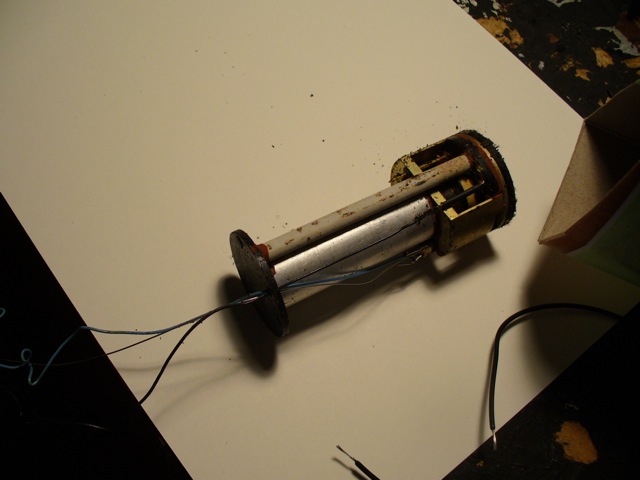
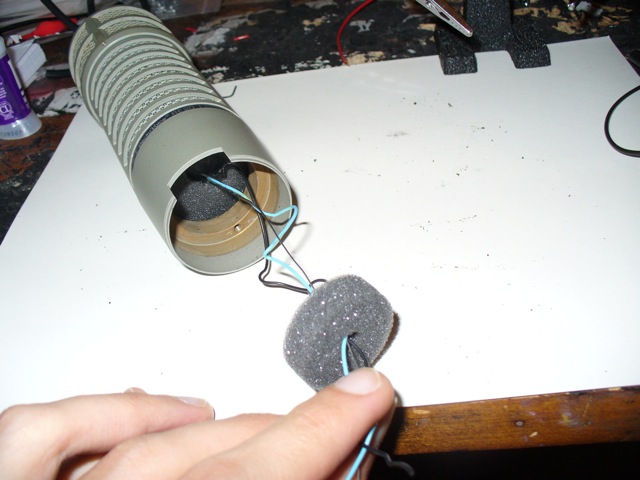
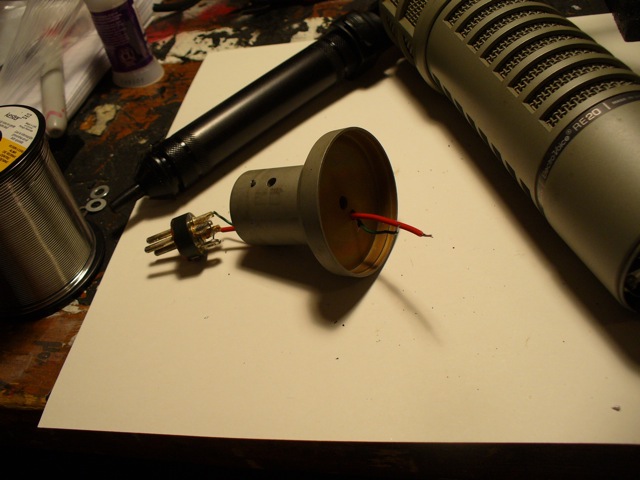
Since my mic was really disgusting, I also snipped the wires to the xlr jack for easier cleaning. If your mic is in better shape, you don't need to do this. Gently remove the motor from the top of the mic's body. Here's everything taken apart:
Cleaning the mic
First, I got as much of the gunk out of the body and grill as I could with q-tips, a toothbrush, and isopropyl alcohol.

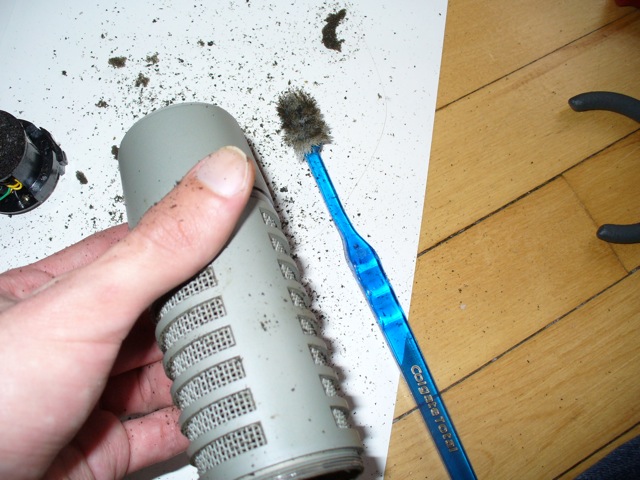
Next, I cleaned the body, grill, and bottom piece with water, dish soap and scotch-brite, and set them down to dry. In addition to the rotten foam, the grill was coated with schmutz from, I assume, people's filthy mouths.
Carefully clean the electronic parts. I erred on the side of not destroying the motor, rather than getting overzealous. Since the ground wire was broken, I attached a new one to the motor.
Putting it back together
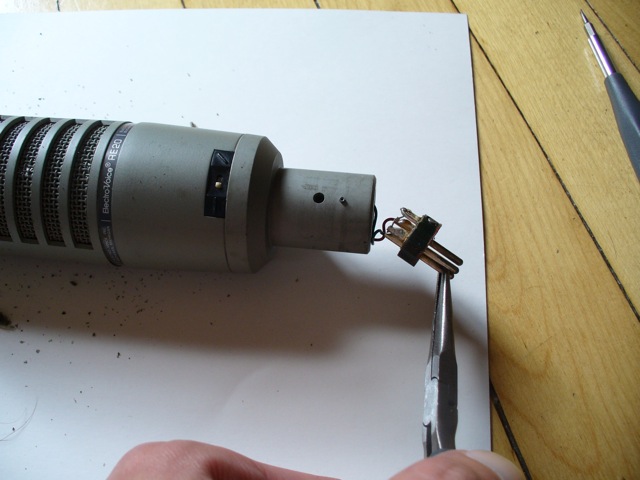
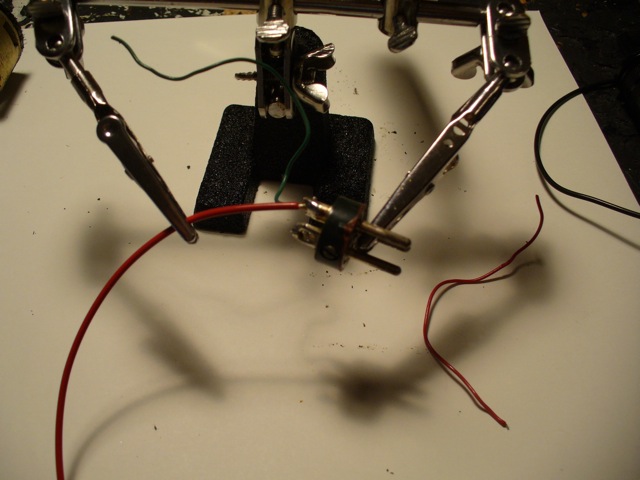
One of the wires going to the xlr jack didn't look good, so I replaced it.
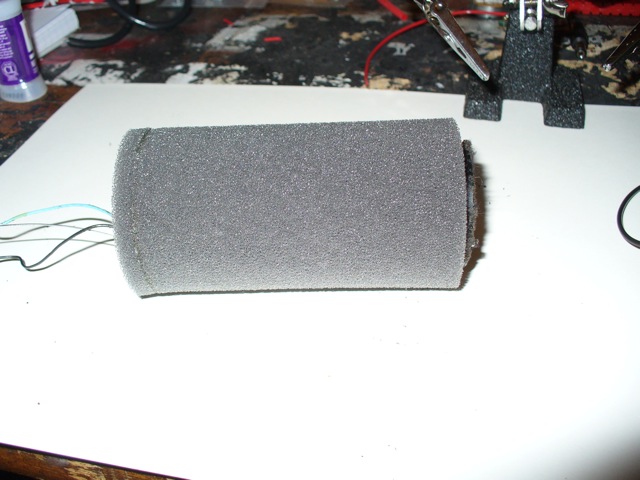
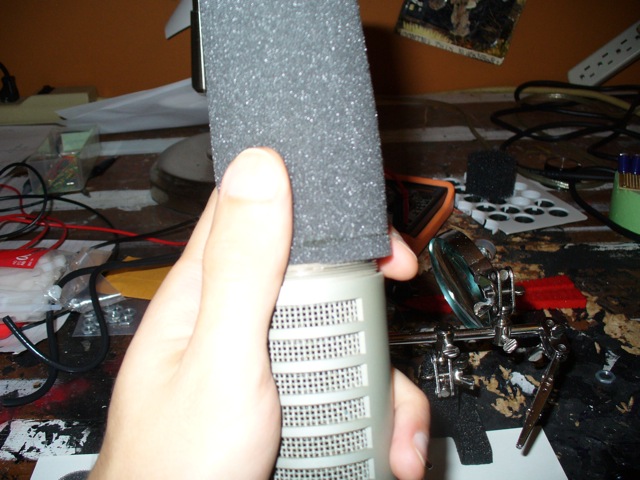
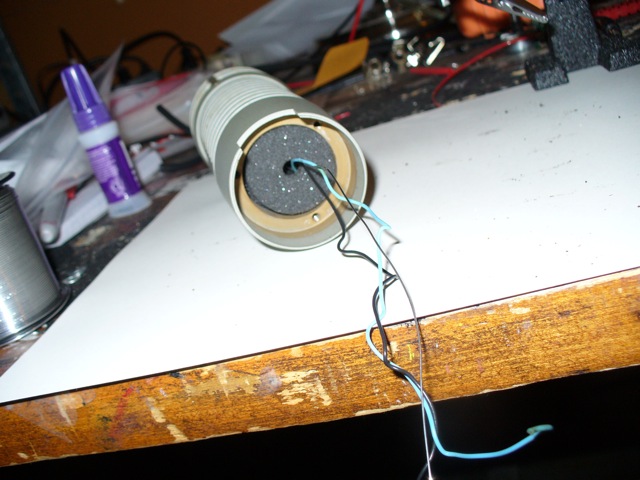
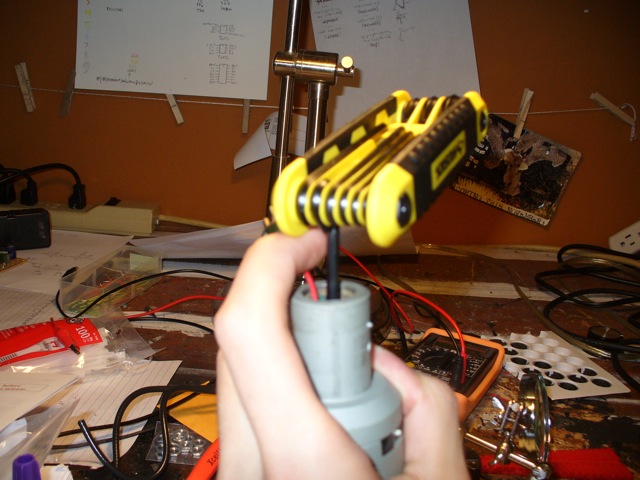
Slide the motor into the large windscreen.
Insert the motor and windscreen into the body. You need to be patient here. Make sure that the wires are threaded down into the bottom of the microphone body.
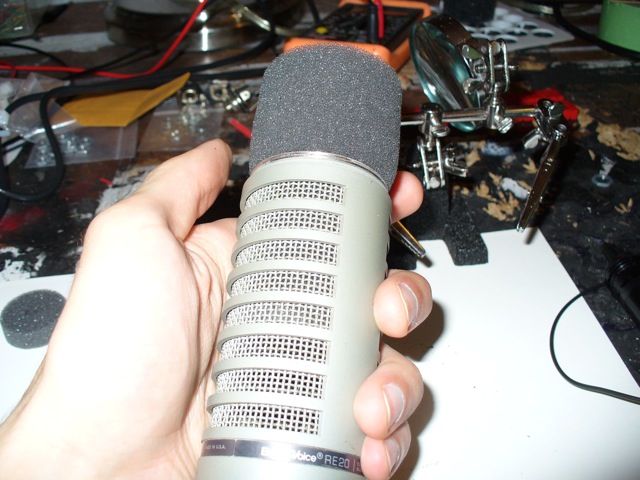
Put the pop filter into the grill. No need to pack it in tightly.

Screw the grill onto the body, and replace the small screw.

Thread the wires through the bottom foam piece, and push it into place.
Thread the wires through the electronics assembly, and replace that and the Y-shaped bracket. You can solder the wires back before or after you do this, doesn't really matter.

Here it is with the wires from the motor re-attached:
If you removed the wires to the xlr connector, reattached those. Note that they go through the middle of the three holes in the bottom bell.

Put the bottom bell back in place, and bolt it down. If the Y-shaped bracket has a post sticking up, that needs to fit in the outermost of the three holes in the bottom bell. In the background of this picture you can see the parts for some inductors I'm winding...if everything goes as planned, I'll post about that in a couple months.
Put the xlr jack back in place, and lock it with the screw.

And that's it! If everything went well, you've got a nice, working mic...at least, until the next time its innards turn to a sticky mess.
If anyone has successfully replaced the mesh that covers the capsule, I'd like to hear how that's done. It seemed too risky to me, but perhaps I was being overly cautious.